.NET Tutorial - Hello World in 5 minutes
Intro
Purpose
Install .NET, Visual Studio Code, and create your first application.
Prerequisites
500 MB of available hard-drive space.
- 500 MB of available hard-drive space.
- macOS 12.0 or later versions.
Time to complete
5 minutes + download/installation time
Scenario
A simple application written in C# that prints Hello, World! to your VS Code console.
Download and install
To build your first .NET application, you'll need to install the .NET SDK, Visual Studio Code, and C# Dev Kit.
What are the .NET SDK, Visual Studio Code, and C# Dev Kit?
The .NET SDK (Software Development Kit) is a free and open-source collection of tools and libraries you will need to build and run applications using C#. C# is the modern object-oriented programming language you will be using for this tutorial.
Visual Studio Code (VS Code) is the world's most popular lightweight, free, and open-source code editor. This is where you will write your C# code.
C# Dev Kit is a powerful set of VS Code extensions that makes C# development easier. It helps you write, test, and debug your code as you build apps.
The .NET WinGet Configuration file will install the .NET 10 SDK, VS Code, and C# Dev Kit for you. If you already have something installed, WinGet will skip that installation step.
To build your first .NET application with Visual Studio Code, set up your environment:
-
Download and install the .NET SDK:
Download .NET 10 SDK x64 (Intel)
Download .NET 10 SDK Arm64 (Apple Silicon)If you're on a Mac with an Apple M1 or M2 chip, you need to install the Arm64 version of the SDK.
-
Download and install VS Code:
-
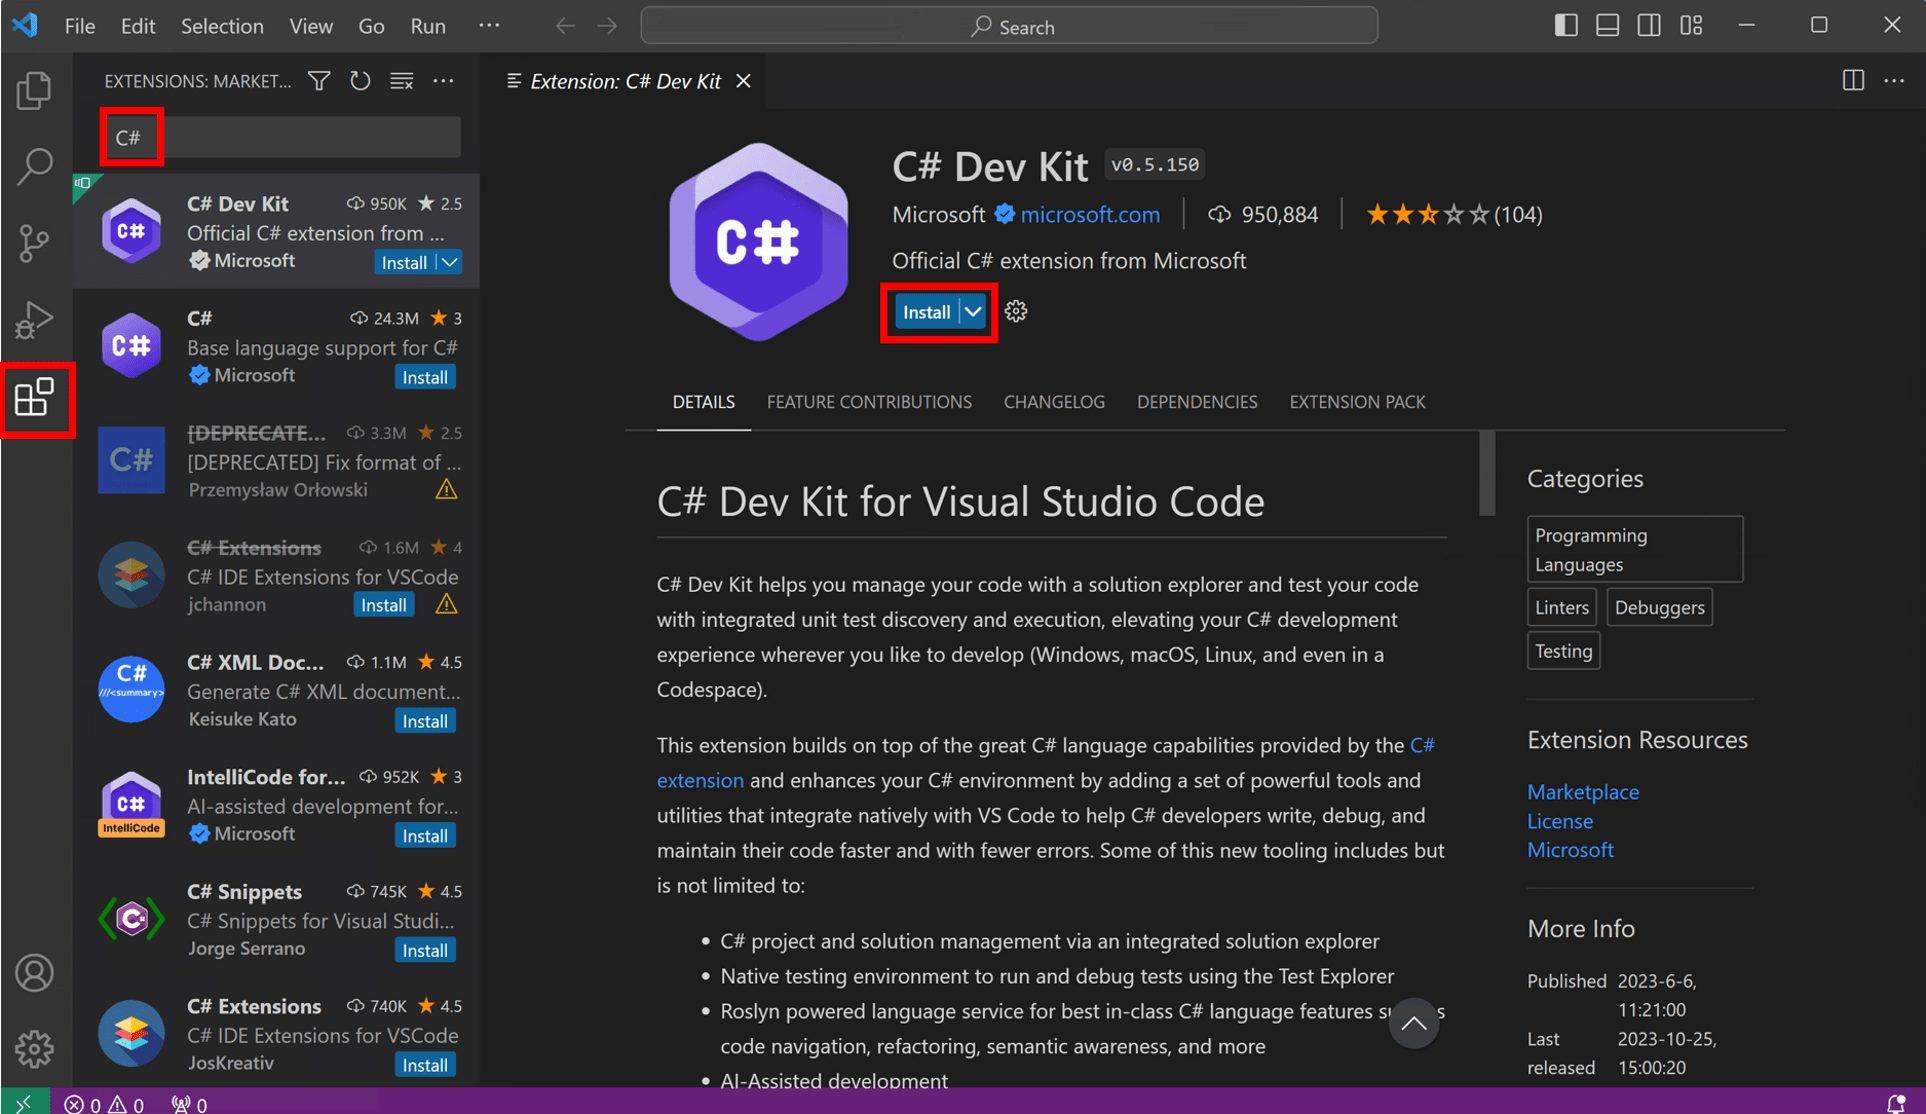
Open VS Code and select the Extensions button in VS Code's Activity Bar to the left. Type C# in the search bar, select C# Dev Kit, and then select the Install button on the C# Dev Kit extension page.
![VS Code's C# Dev Kit']()
Download and run the configuration file
Click the following link to download the WinGet file:
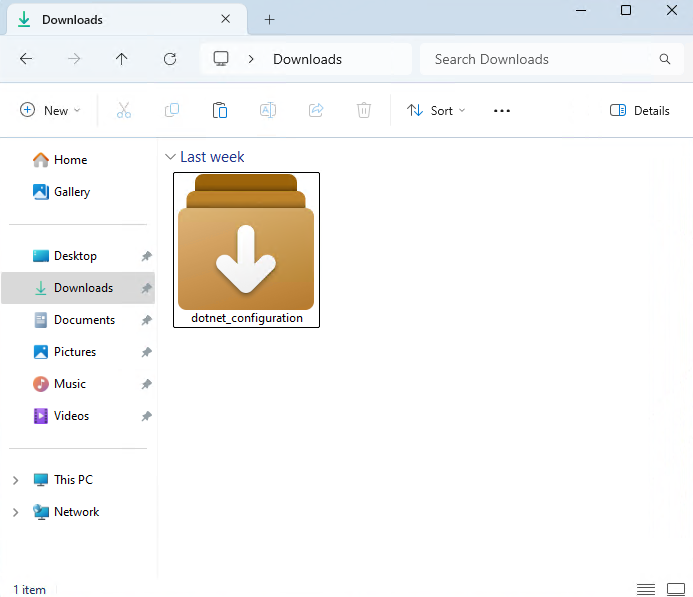
Open your downloads folder and double-click on the file to begin installation. If you're asked to select an application to run the file, select Windows Package Manager Client.
A terminal will open and you should see that the WinGet Configuration file is ready to install the .NET 10 SDK, VS Code if you do not have it, and C# Dev Kit.
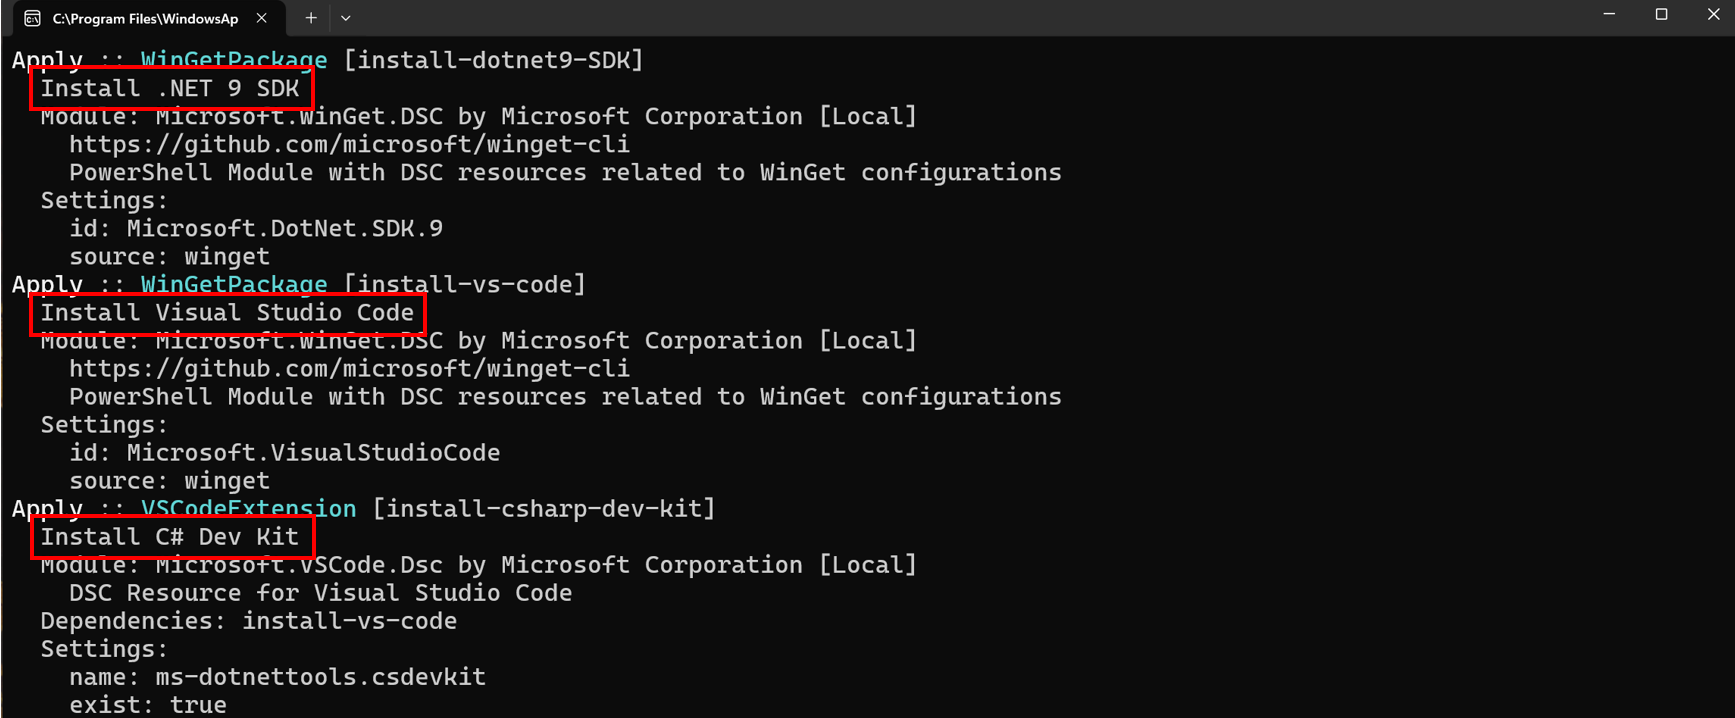
Read the license agreement and agree to it by typing "y" in the terminal and pressing Enter.
Note: You are responsible for understanding the configuration settings you are choosing to execute. Microsoft is not responsible for the configuration file you have authored or imported. This configuration may change settings in Windows, install software, change software settings (including security settings), and accept user agreements to third-party packages and services on your behalf. By running this configuration file, you acknowledge that you understand and agree to these resources and settings. Any applications installed are licensed to you by their owners. Microsoft is not responsible for, nor does it grant any licenses to, third-party packages or services.

WinGet is now installing everything you need to get started! Install time will depend on your machine specifications, network speed, and more. It can take as little as 5 minutes but up to 15 minutes to complete.
Some install steps may require administrator-level permissions to install. Be on the lookout for flashing User Account Control (UAC) prompts in your Windows Taskbar and click on that icon. To continue installation, you must select Yes if prompted.

When the installation is complete, you should see the output below in the terminal.

Check everything installed correctly
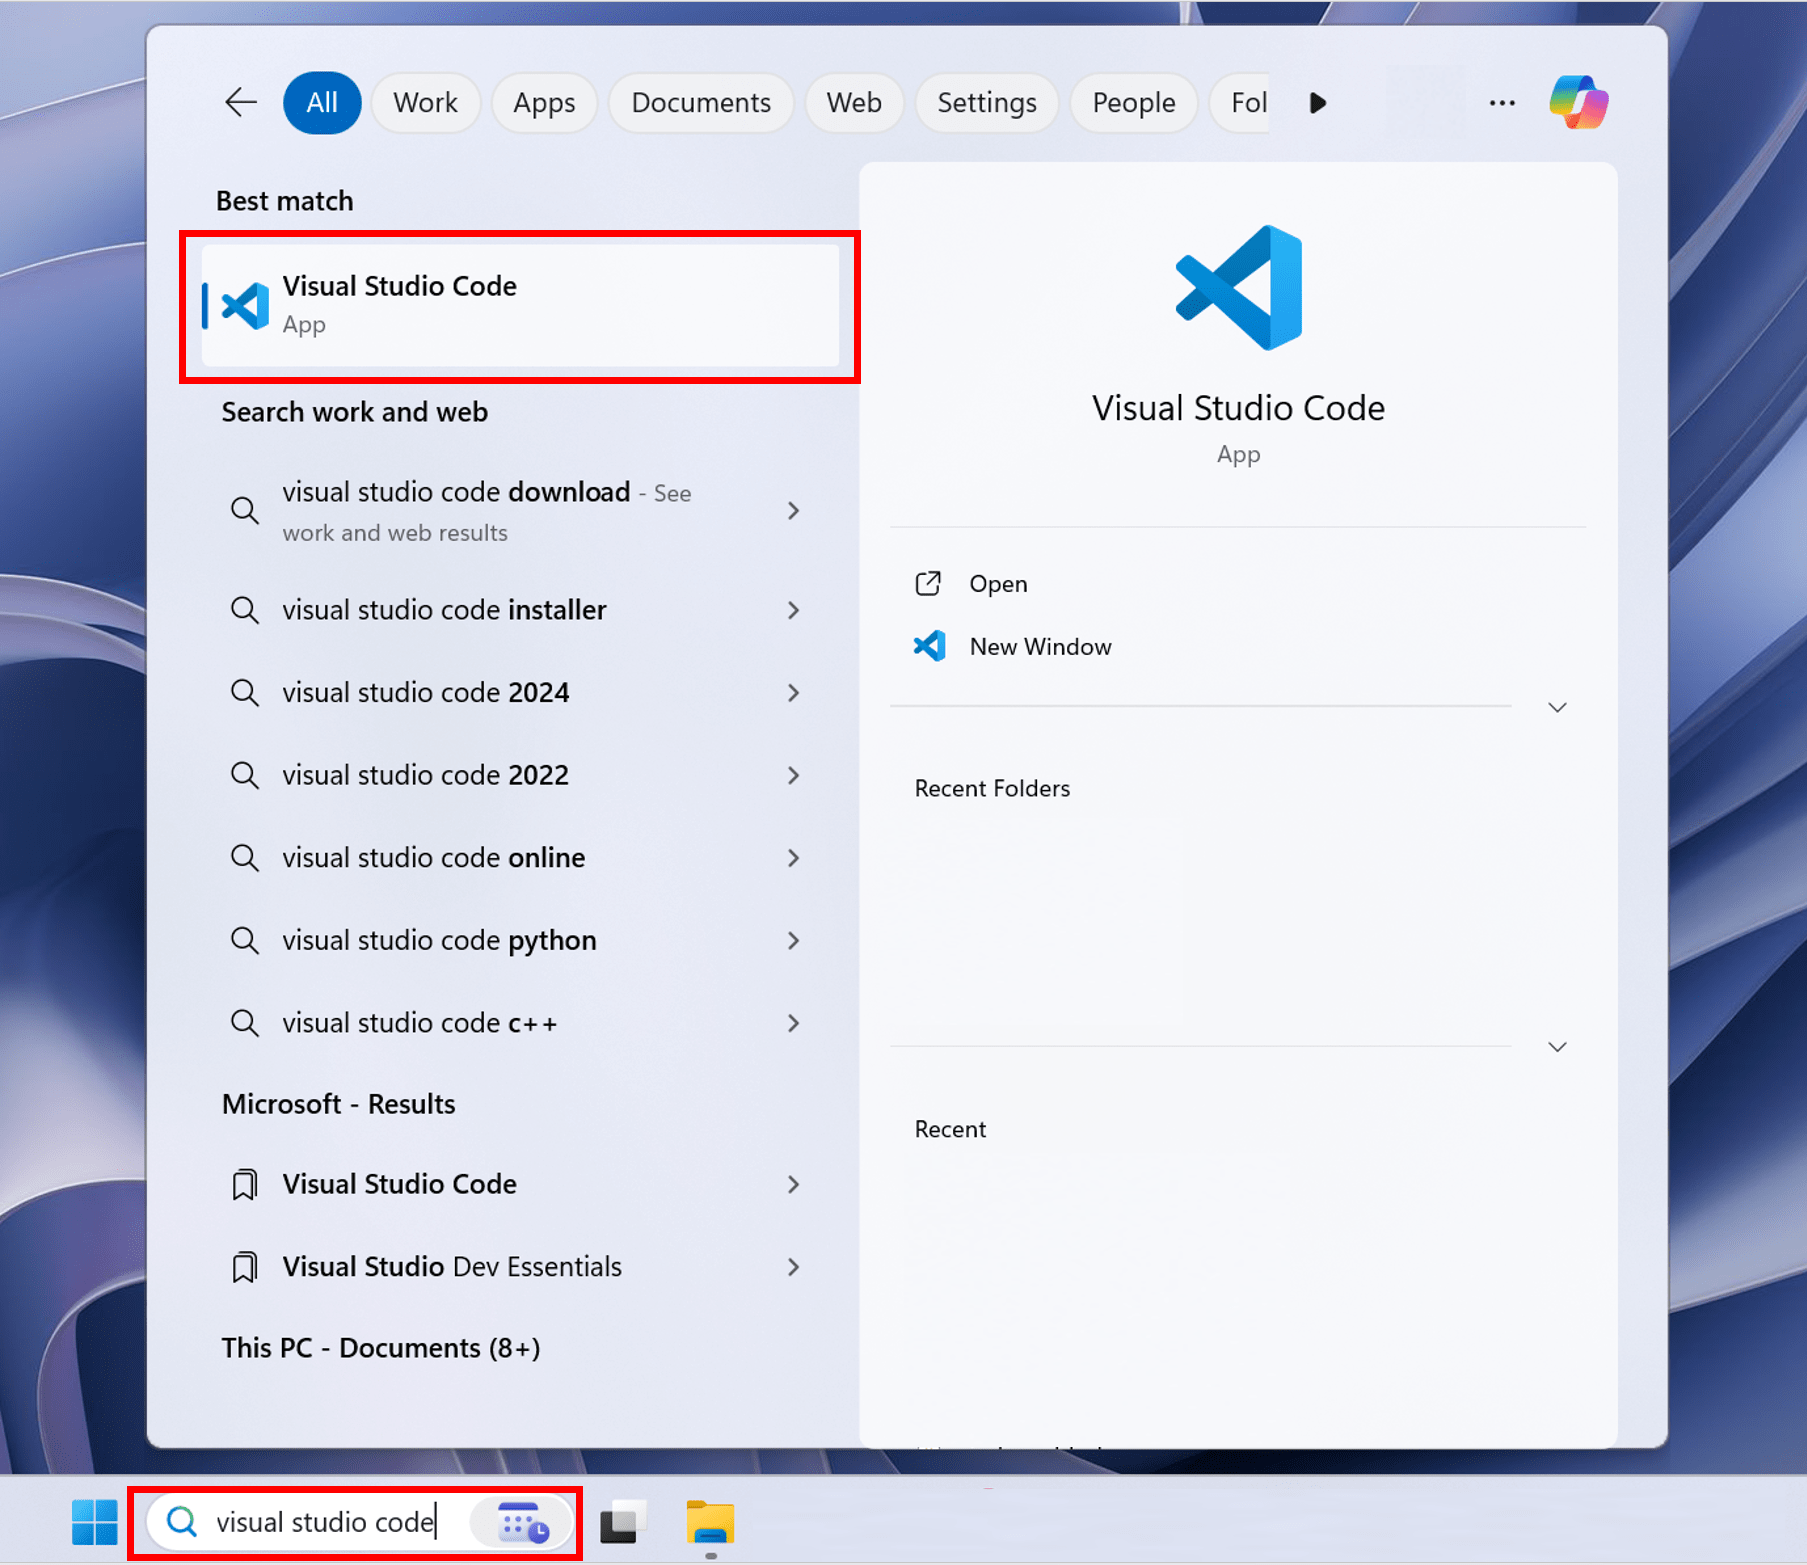
Now that your environment is set up, go to the Search in your Windows Taskbar, and type Visual Studio Code. Click the application to open VS Code.
Once you've set up your environment, open a new VS Code terminal. In the toolbar, select Terminal, then New Terminal.
Note: If you open VS Code through a terminal, you'll need to enable Workspace Trust.
Now open a new terminal by going to the toolbar and selecting Terminal, then New Terminal.
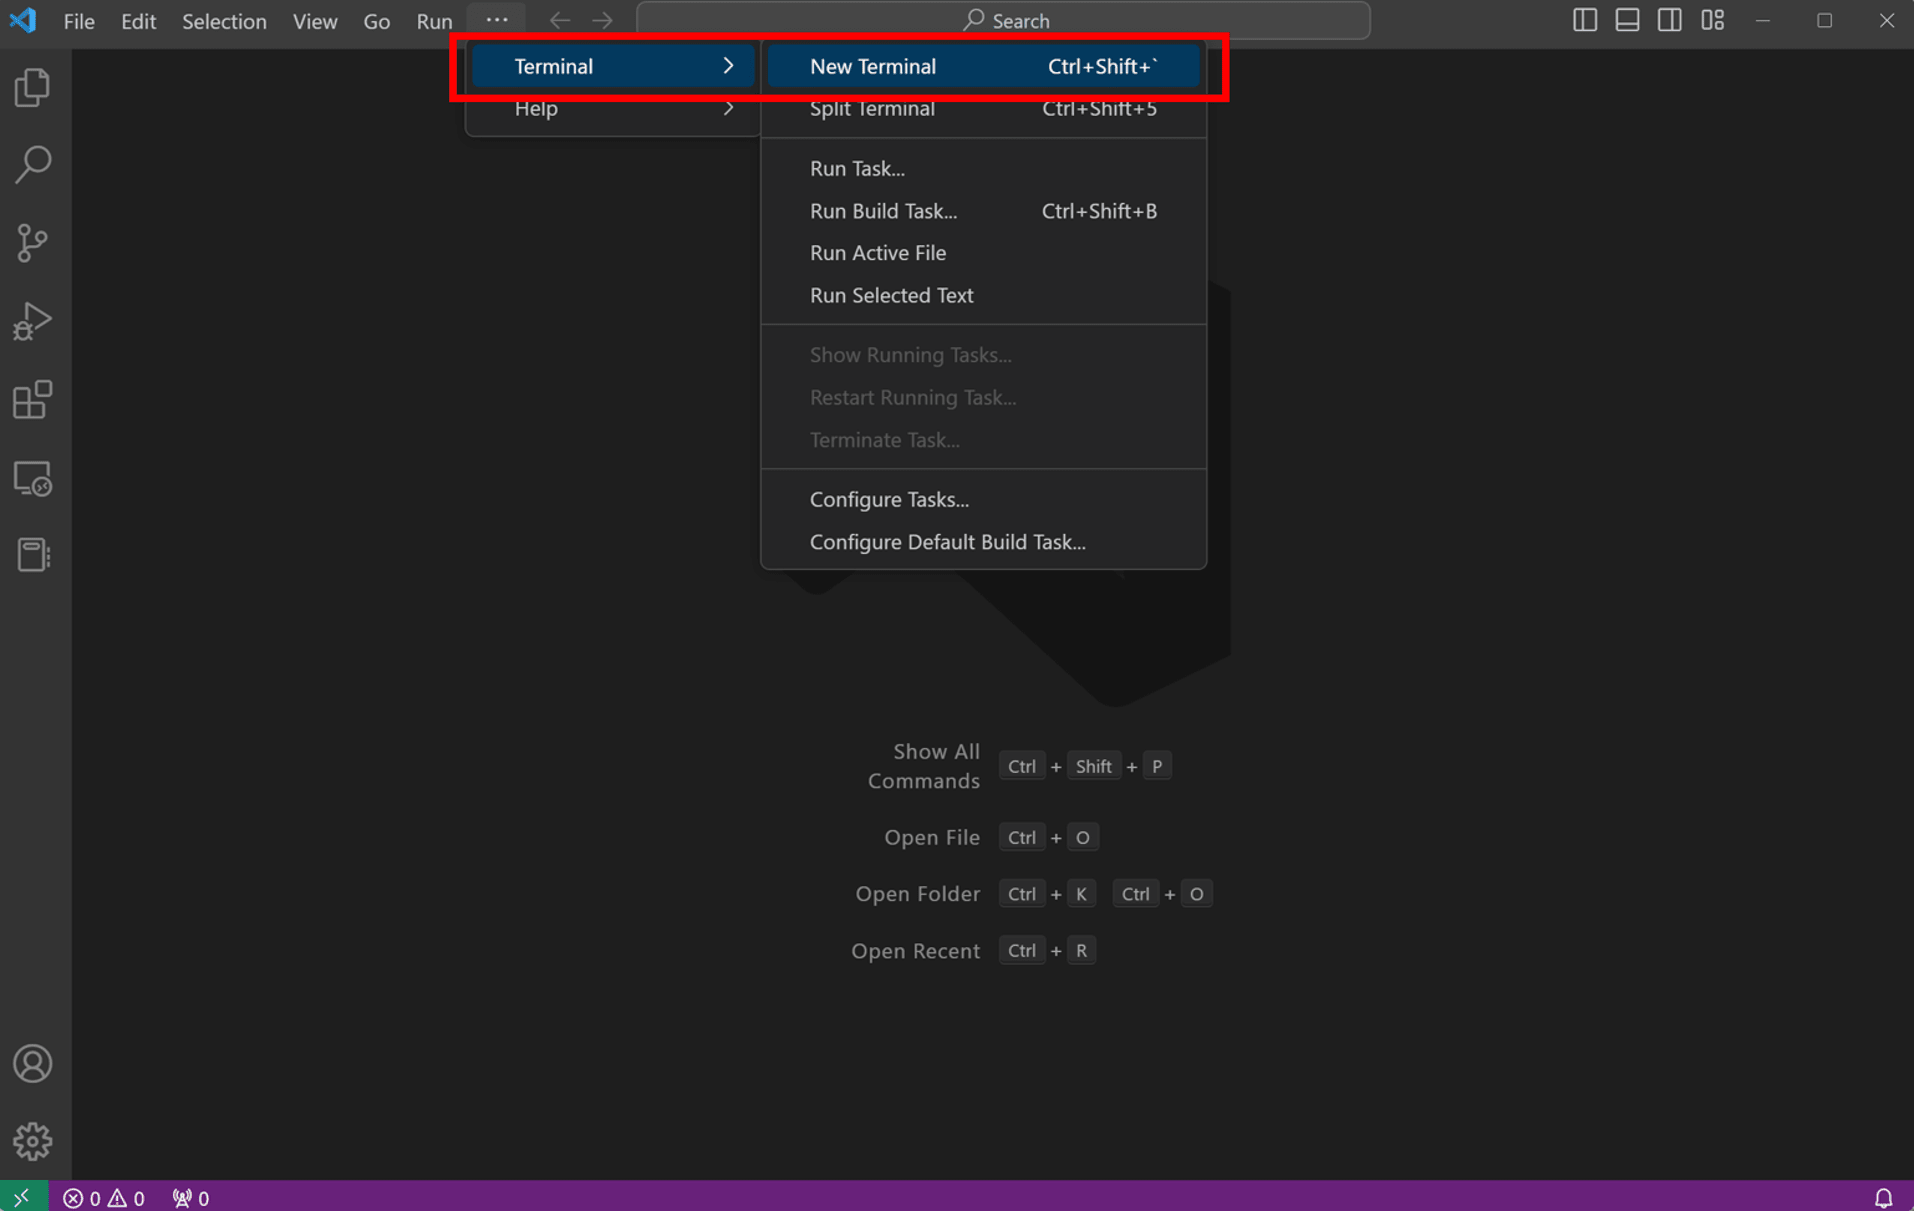
In your terminal, run the following command to check your installation.
dotnet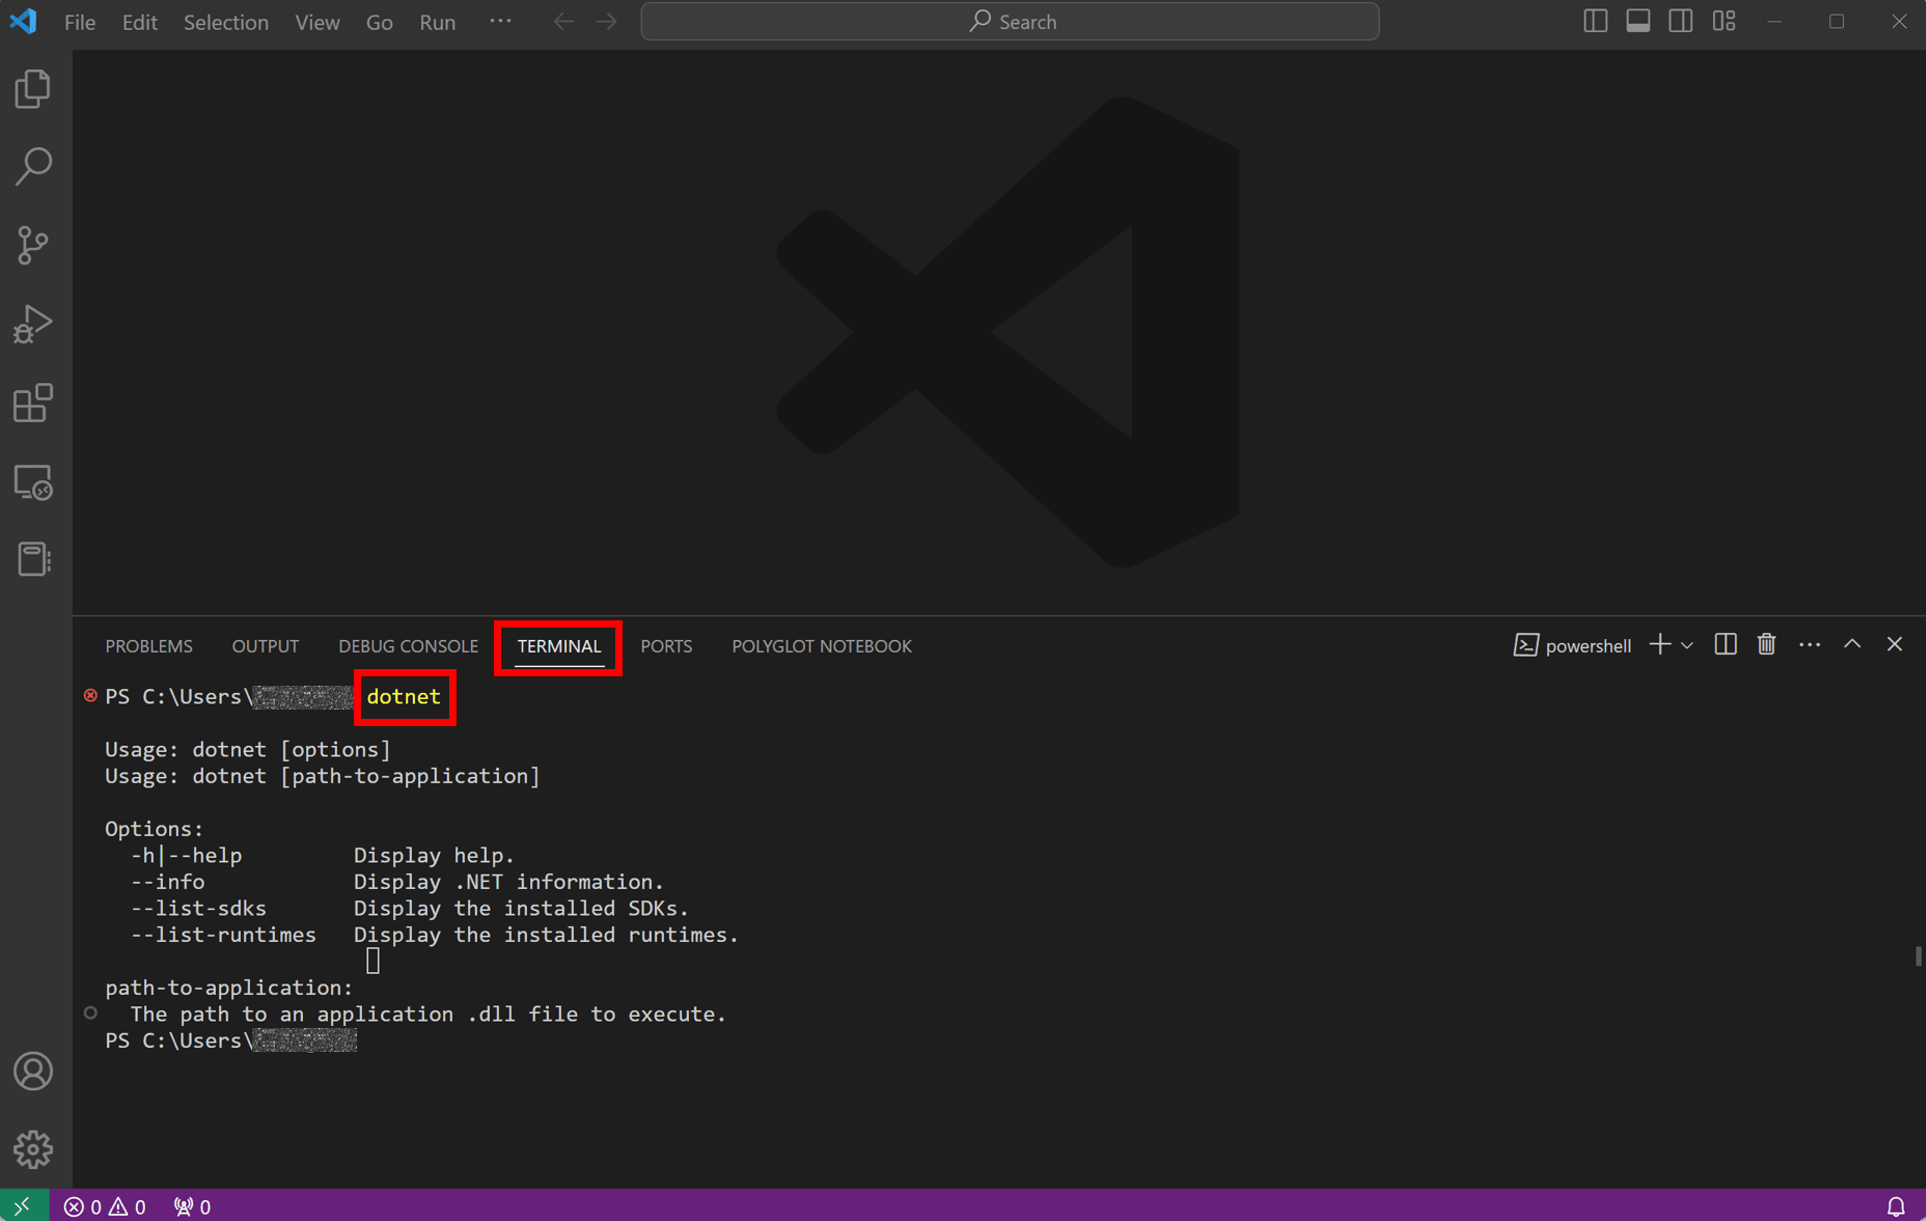
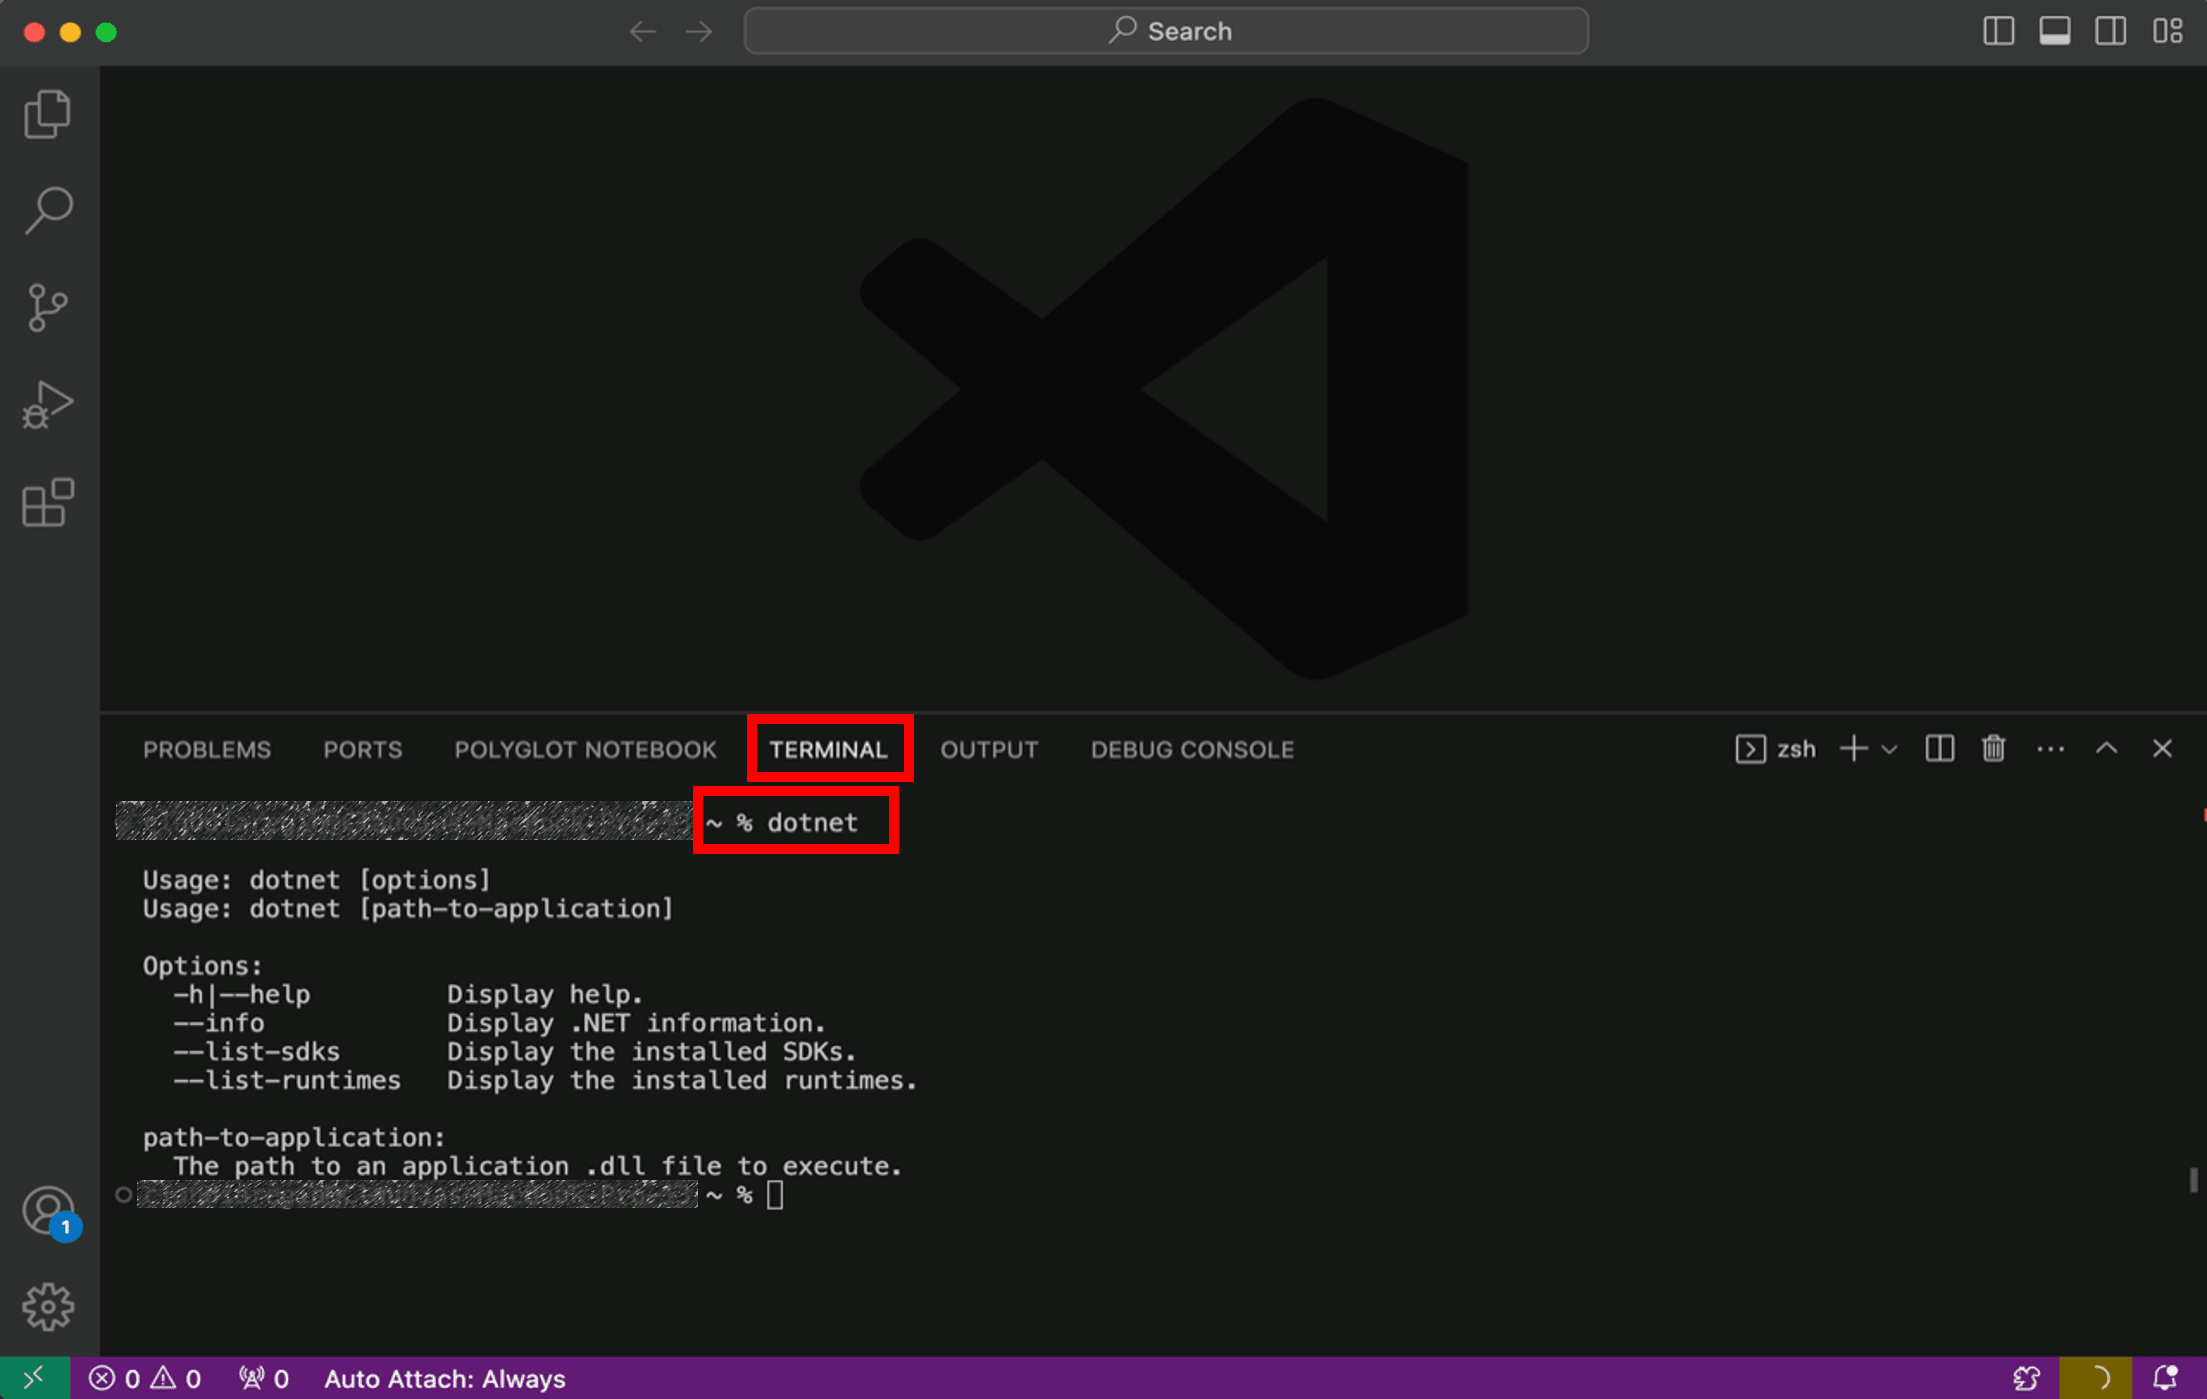
If the installation succeeded, you should see an output similar to the following:
Usage: dotnet [path-to-application]
Usage: dotnet [commands]

path-to-application:
The path to an application .dll file to execute.

commands:
-h|--help                         Display help.
--info                            Display .NET information.
--list-runtimes [--arch ]         Display the installed runtimes matching the host or specified architecture. Example architectures: arm64, x64, x86.
--list-sdks [--arch ]             Display the installed SDKs matching the host or specified architecture. Example architectures: arm64, x64, x86.
If everything looks good, select the Continue button below to go to the next step.
Got an error?
If you receive a 'dotnet' is not recognized as an internal or external command error, make sure you opened a new VS Code terminal. If restarting VS Code or restarting your machine doesn't resolve the issue, use the I ran into an issue button to get help fixing the problem.
Create your app
- Open the command palette in VS Code by pressing CTRL+SHIFT+P.
- Open the command palette in VS Code by pressing CMD+SHIFT+P.
- Type .NET: to see the commands you can run with C# Dev Kit!
- Find and select .NET: New Project to create a new .NET project.
- Scroll down and select Console App.
- Choose the folder location you'd like to save your project.
- Name the project
MyConsoleAppin the command palette when prompted.
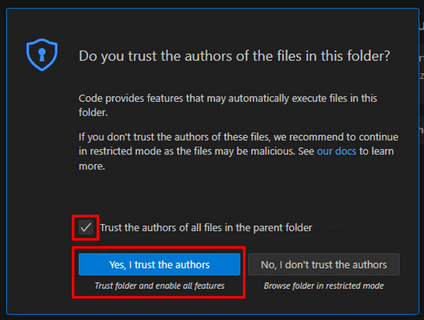
If asked, enable Workspace Trust by checking the box and selecting Yes, I trust the authors.
Note: While sign in isn't required or enforced by the extension, you might need to sign in using your Visual Studio account to comply with the EULA requirements for the C# Dev Kit extension.
In the VS Code Side Bar, make sure the Explorer is open. Click on the MyConsoleApp folder to make sure it is expanded.
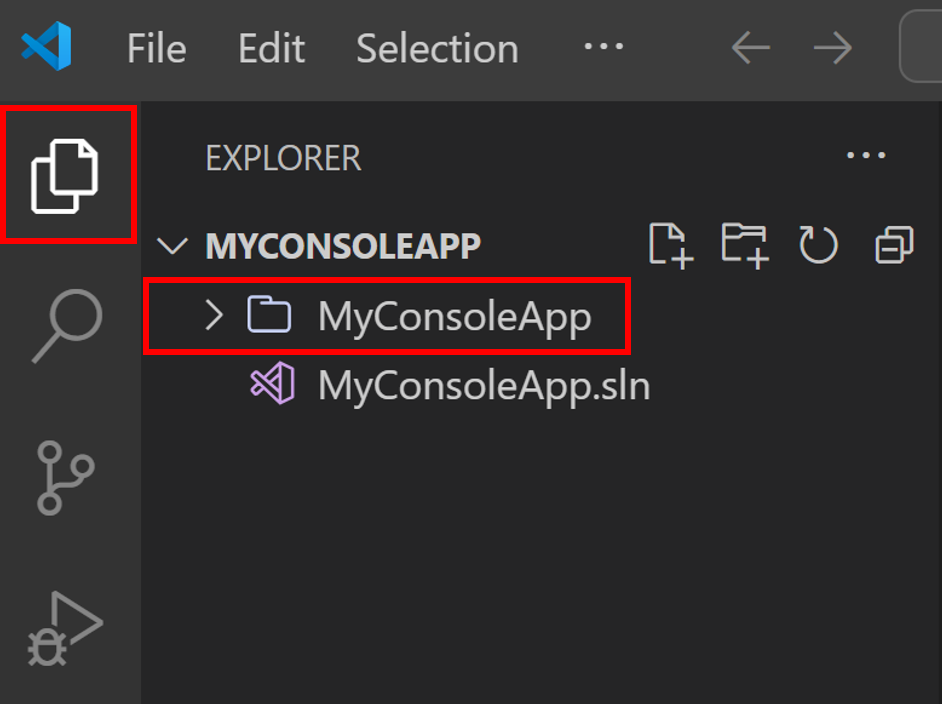
The main file in the MyConsoleApp folder is called Program.cs. By default, it already contains the necessary code to write Hello, World! to the terminal. Click on the file to see the code created by the template:

Select the Continue button below to go to the next step.
Got an error?
If you can't resolve the issue you're having, select the I ran into an issue button below to get help fixing the problem.
Run your app
To run your application, select the dropdown menu to the right of the run button in the top right, and select Run project associated with this file.

You should see Hello, World! in your VS Code terminal.
Hello, World!Congratulations, you've built and run your first .NET app! Select the Continue button below to go to the next step.
Edit your code
In the Program.cs file, add the highlighted line after the code that prints Hello, World!, like the following:
// See https://aka.ms/new-console-template for more information
Console.WriteLine("Hello, World!");
Console.WriteLine("The current time is " + DateTime.Now);
Save the Program.cs file and select Run project associated with the file again. If you succeed, you should see an output similar to the following:
Hello, World!
The current time is 2/15/2026 2:41:25 AM
Next steps
Congratulations, you've built and run your first .NET app!
Keep learning
To keep learning general .NET skills, try our tutorials on Microsoft Learn where you'll learn about .NET, dependencies, working with files, debugging, and more:
Build .NET applications learning path
Learn C#
C# is .NET's modern, innovative, open-source programming language for building all your apps. Get started by trying our C# interactive tutorials on Microsoft Learn:
Take your first steps with C# on Microsoft Learn
.NET for Beginners
Let Claudia walk you through the basics of .NET with her beginner video series:
You might also be interested in...
